PopotamAll menusCreate my meal plan

Decorated Christmas sugar cookies

A buttery shortbread dough that holds its shape, cookie-cutter trees and stars, a crisp lemon icing: the December baking session.

VegetarianWith the kids

Christmas sugar cookies are the ones you cut out as a family, decorate at the kitchen table and hang on the tree. Crisp, thin, scented with vanilla and lemon, they should stay flat with clean edges so the decoration holds.

The secret isn't in the ingredients but in the temperature: cold butter rubbed into the flour, dough rolled out BEFORE it's chilled, and shapes cut while cold. The result: stars that are still stars when they come out of the oven, and icing that dries glossy.

45minprep
24mincooking
2 hresting
Easylevel
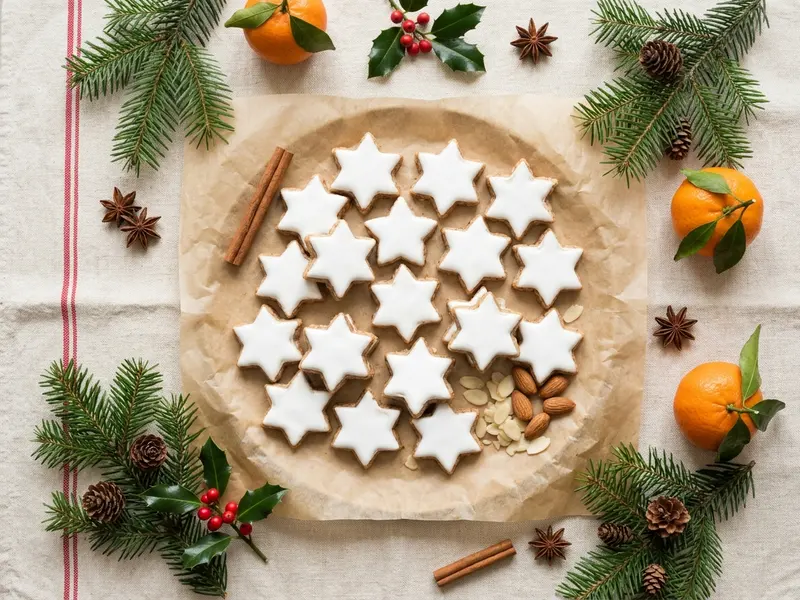
Decorated Christmas sugar cookies: a serving idea
Decorated Christmas sugar cookies

Step-by-step recipe check things off as you go

  1. Rub in the butter

    In the bowl, mix the flour, powdered sugar and salt. Add the cold butter cut into small cubes and rub everything between your palms, without lingering, until it looks like fine sand with no visible bits of butter.

    Popotam's tip · If your hands run warm, hold them under cold water and dry them: butter that melts while you rub it in makes hard cookies that spread.
  2. Bring together, don't knead

    Beat the egg with the vanilla and zest, pour it over the sand and stir with a fork, then quickly gather it by hand. Stop as soon as the dough forms an even ball: the more you work it, the more elastic the cookies get and the more they shrink.

  3. Roll, then chill

    Split the dough in two. Roll each half between two sheets of baking paper to an even 4 mm. Lay the sheets flat on a tray and chill for 1 hour: the dough should be firm, like a bar of chocolate.

    Popotam's tip · Rolling the dough while soft, then chilling it, means no extra flour on the counter: the cookies stay tender.
  4. Cut out the shapes

    Preheat the oven to 170 °C (340 °F), conventional heat. Peel off the top sheet, cut out your shapes with a firm press, and set them on a lined tray, 2 cm apart. Punch a small hole at the top of each cookie with the straw if you want to hang them. Gather the scraps, roll them out again and chill for 15 minutes before cutting.

  5. A quick chill

    Put the filled tray in the freezer for 10 minutes (or the fridge for 20) just before baking. The shapes then bake before the butter has time to melt: the points of the stars stay sharp.

  6. Baking

    Bake one tray at a time, in the middle of the oven, for 10 to 12 minutes. They're done when the edges are just starting to turn golden and the center is matte and pale. Leave them on the tray for 5 minutes (they're fragile while hot), then slide them onto a rack.

  7. Make the icing

    Mix the powdered sugar with 2 tbsp lemon juice: you want a paste as thick as toothpaste, that holds when you draw a line. Set a third aside for outlines. Thin the rest with lemon juice, a few drops at a time, until a ribbon drizzled into the bowl disappears in about 10 seconds: that's the flooding texture. Color it if you like.

    Popotam's tip · Cover the bowls with a damp cloth while you decorate: the icing crusts over very quickly.
  8. Decorate

    On completely cool cookies, pipe the outline with the thick icing (fine brush or paper cone), then fill the inside with the runny icing, pushing it to the edge with the tip of a toothpick. Add pearls and sprinkles straight away, while it's wet.

  9. Let them dry

    Let the cookies dry flat at room temperature for at least 1 hour, ideally overnight, before stacking or hanging them. The icing is dry when a finger leaves no mark.

And there you go, it's ready

Check off every step to celebrate.

The secrets to getting it right what makes all the difference

The secrets

  • It's all about cold: cold butter to rub in, cold dough to cut, cold shapes going into the oven.
  • Thickness sets the baking: 4 mm everywhere, or the thin ones burn while the thick ones stay raw. Two 4 mm sticks on either side of the rolling pin make a perfect guide.
  • Decorate COLD cookies: on a warm cookie, the icing melts and runs.

Storing and making ahead

Once the icing is fully dry, the cookies keep for 2 weeks in a tin, away from moisture, layered with baking paper. Raw dough, rolled out and well wrapped, keeps for 3 days in the fridge or 2 months in the freezer: cut it while still frozen, the edges will be even cleaner.

Variations

  • Chocolate: swap 30 g of the flour for 30 g unsweetened cocoa powder.
  • Spiced: add 1 tsp cinnamon and half a tsp ground ginger to the flour.
  • With royal icing (the pastry chef's fine piping): 1 egg white beaten with 200 g powdered sugar and 1 tsp lemon juice. The white stays raw: use pasteurized egg white (from a carton) if you're serving pregnant women, toddlers or vulnerable people.

The questions you're asking

Why did my cookies lose their shape in the oven?

The dough was too warm going in, or overworked. The 10 minutes in the freezer just before baking almost always solves it.

My icing stays sticky, what can I do?

It was too runny, or the air is damp. Let them dry overnight in a dry room, away from a steamy kitchen. Next time, add the lemon juice drop by drop: you can fix icing that's too thick, not icing that's too runny (except by adding more powdered sugar).

Can I make the cookies ahead?

Yes, that's ideal: baked and decorated a week ahead, they're perfect by Christmas. You can also freeze the rolled-out dough and bake at the last minute.

recipe by recipe

Build your holiday meal

Add this recipe to your meal, then come back for appetizers, a drink, cookies with coffee: Popotam brings them together, with the shopping for your whole table and the timeline up to dessert. Free, no account.

More cookies and treats tasted and approved